
Testing Out the RV Oven with Vegan Scratch Biscuits
When we had the bakery, one of our most popular items were our vegan scratch biscuits. So I decided on our second trip out to put another appliance to the test by making some scratch vegan biscuits in the RV oven.
Why do people hate their RV propane ovens?
On the lead up to hitting the road in the RV, we’ve been watching loads of YouTube videos of those who have gone before us. And from that I had the overall impression that many people rarely or never use their RV oven, instead preferring to use the convection/microwave, stovetop, or just cook outside.
I’m not sure why people avoid their RV oven. Maybe they’re used to fancy push button ovens they had in their houses. I’ve never had one of those. 🙂 So I’m already familiar with using a stone to distribute heat better and checking periodically with an oven thermometer to make sure the oven is the temperature you need. And I could even pull gorgeous artisan sourdough bread with a lovely crust out of my crappy, bare bones electric oven. So I figured, how hard could it be?
The only thing new to me when using the RV oven was the propane. But it’s not much different than using a gas stove which I’ve done plenty of times.
Vegan Scratch Biscuits in the RV Oven
Back to the vegan scratch biscuits. To make life easier since I tested this before we went full time, I premixed the dry and wet ingredients and home and brought them in separate containers. And then I just brought the fat along. The recipe will be down below, but I’ll tell you the basic procedure here.
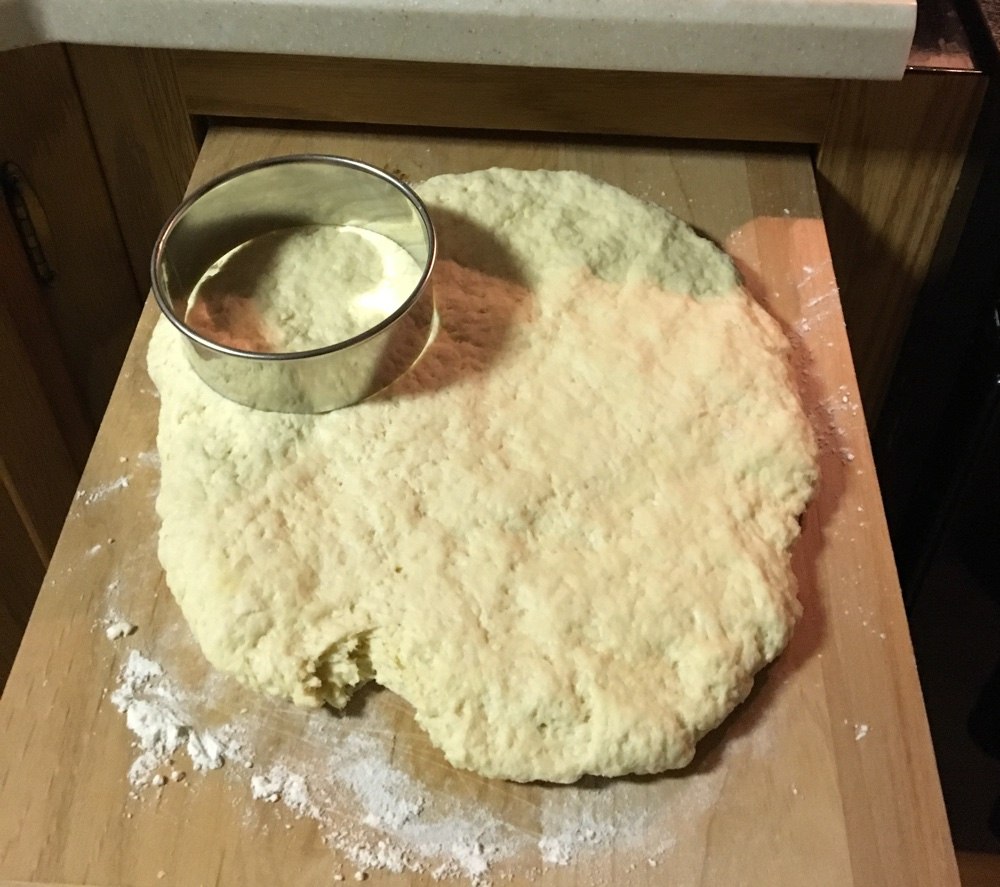
Now, at the bakery, we used to make giant batches of biscuits at a time. Rolling them out took up the whole prep table. Each batch would make about 72 biscuits. That’s a lot of dang biscuits! I scaled that back to a reasonable amount for two people, six biscuits. Oh, and a poop biscuit. What’s a poop biscuit? It’s the little bit of dough that’s left after you’ve cut all the whole biscuits you can from the dough. I used to twirl it around into a pile that looks like poop. Because I’m not right.
The basic procedure for fluffy vegan scratch biscuits is to cut the fat into the dry ingredients until it is crumbly. Some pieces of the fat might be as large as a pea. You’ll want your shortening to be chilled a bit, so it doesn’t melt into the rest of the ingredients.
Then you stir in the liquid and knead it until the gluten starts to form a little bit adding more flour as necessary. It’s hard to describe that. Instead of just breaking apart as the dough will do when you first start kneading, you’ll get a little stretch when you fold it over. But not too much, or you’ll break the fat down too much and the biscuits won’t be fluffy or will get tough. A video of this whole process is probably in order. I’ll add that to my todo list. For now, this will have to be enough.
The dough for six biscuits fit on the little slide out cutting board in our RV when rolled out. You’ll want to roll it about 1/2 to 3/4 inches thick. And then cut out your biscuits with a cutter. A sharp cut also seems to help you get those fluffy layers.
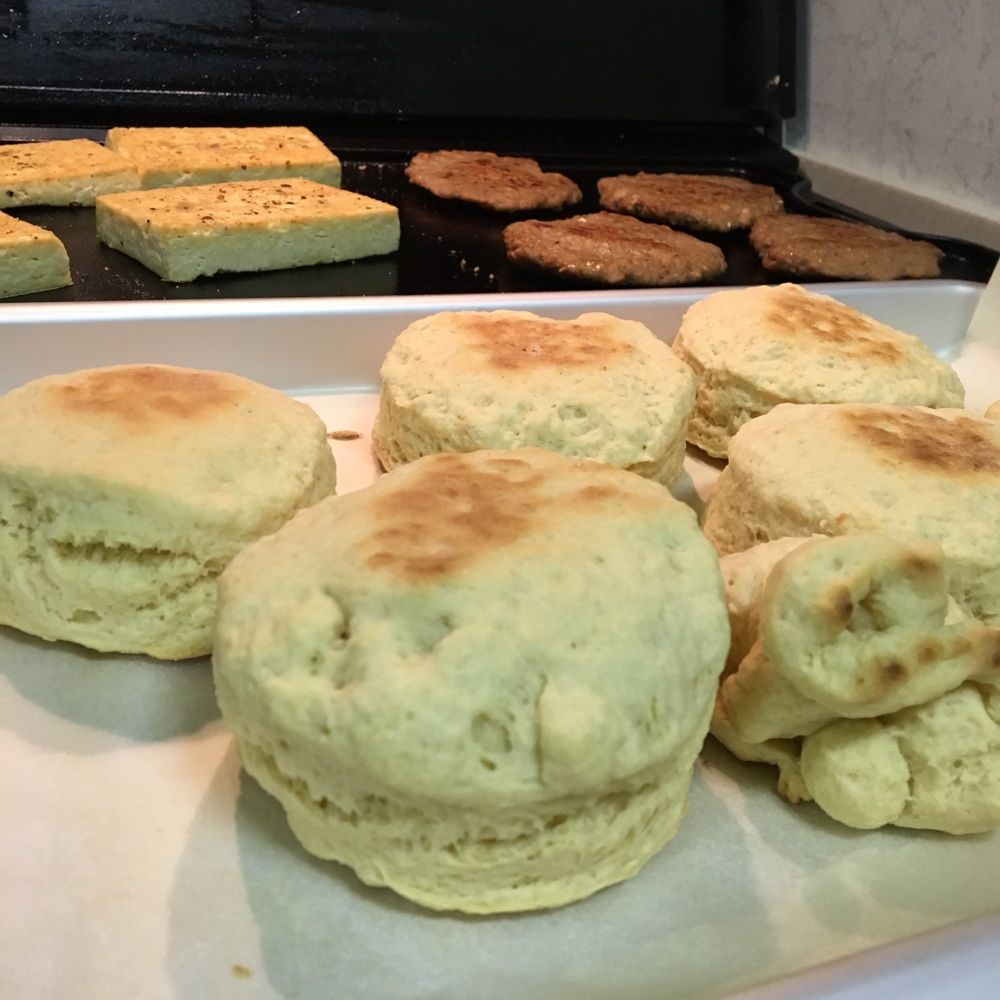
I preheated the oven with the pizza stone in place and baked the biscuits on a parchment-lined baking sheet. Here’s another tip: get decent baking sheets. Fat Daddio’s is a good brand you can get on Amazon. Or, if you have a restaurant supply that is open to the public, you can find them there much cheaper. We have one in Atlanta called Atlanta Fixture. The commercial grade bakeware will hold and distribute heat much more evenly than those thin flimsy things sold for home baking. Just make sure the ones you get will fit in your oven!
So, how did the vegan scratch biscuits come out? Awesome, that’s how! Golden brown on the top and bottom with fluffy layers in between. Yay!
Making Breakfast Sandwiches
Now it’s time to make the innards for our vegan scratch biscuits. At the bakery, we made little round tofu eggs that fit nicely on the biscuit. We also made our sausage patties in house using TVP with seasonings and a binder.
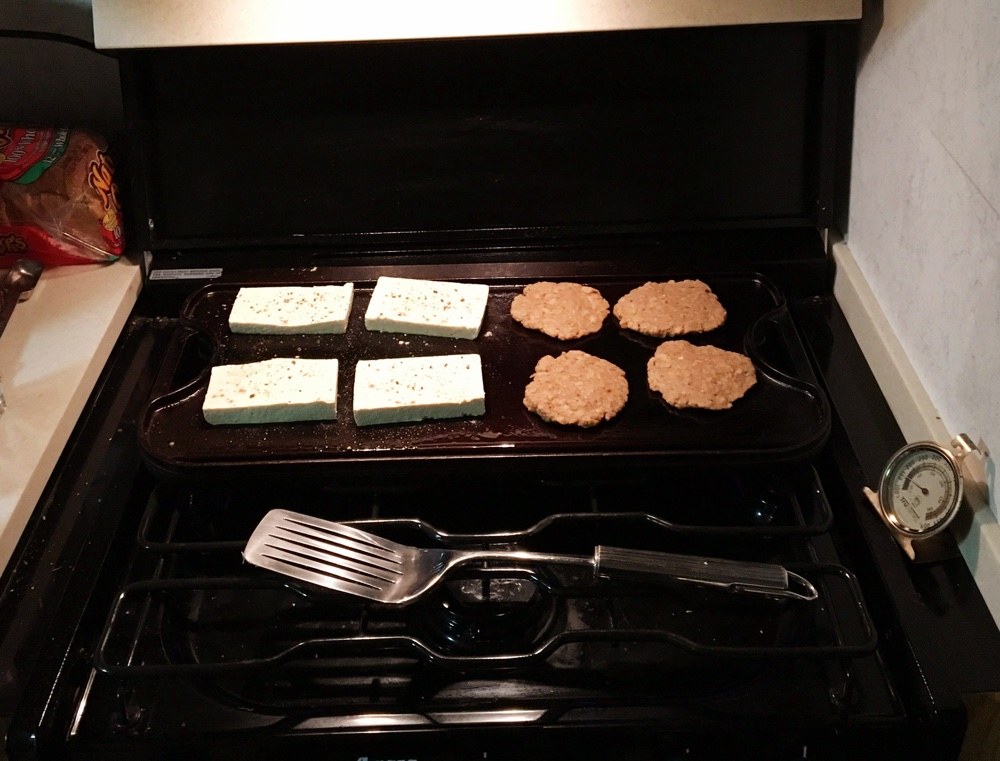
For RV life, I wanted to simplify all that. Instead of the tofu egg patties, I pressed the tofu overnight in a Tofu Xpress. Then I seasoned the outside with salt, pepper, black salt, and nutritional yeast. Then I fried them in a little canola oil on a Lodge griddle pan. The pan spans over the two back burners on our stove and the sausages fit too.
I made the sausage patties using Gimme Lean Breakfast Sausage as a base and then I added more seasoning to it, salt, pepper, sage, and red pepper flakes. I don’t add fennel seed because Kevin hates it, but it’s a great addition if you enjoy it. What you see in the photos is about a half a tube.
The last element needed to make these breakfast biscuits perfect? Cheese, vegan cheese, of course. Normally, I’m all about a slice of orange Tofutti vegan cheese on my breakfast biscuit, but not everywhere carries it. We picked up the tomato cayenne Chao which is a delicious upgrade.
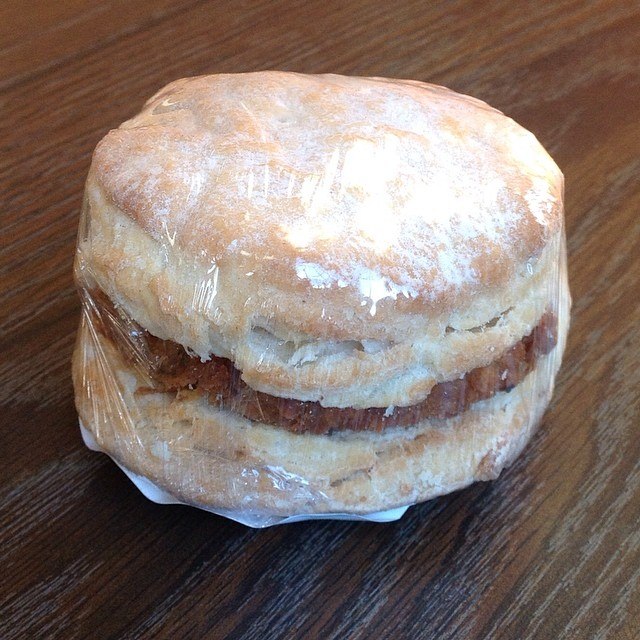
And here’s what the whole thing looks like put together.
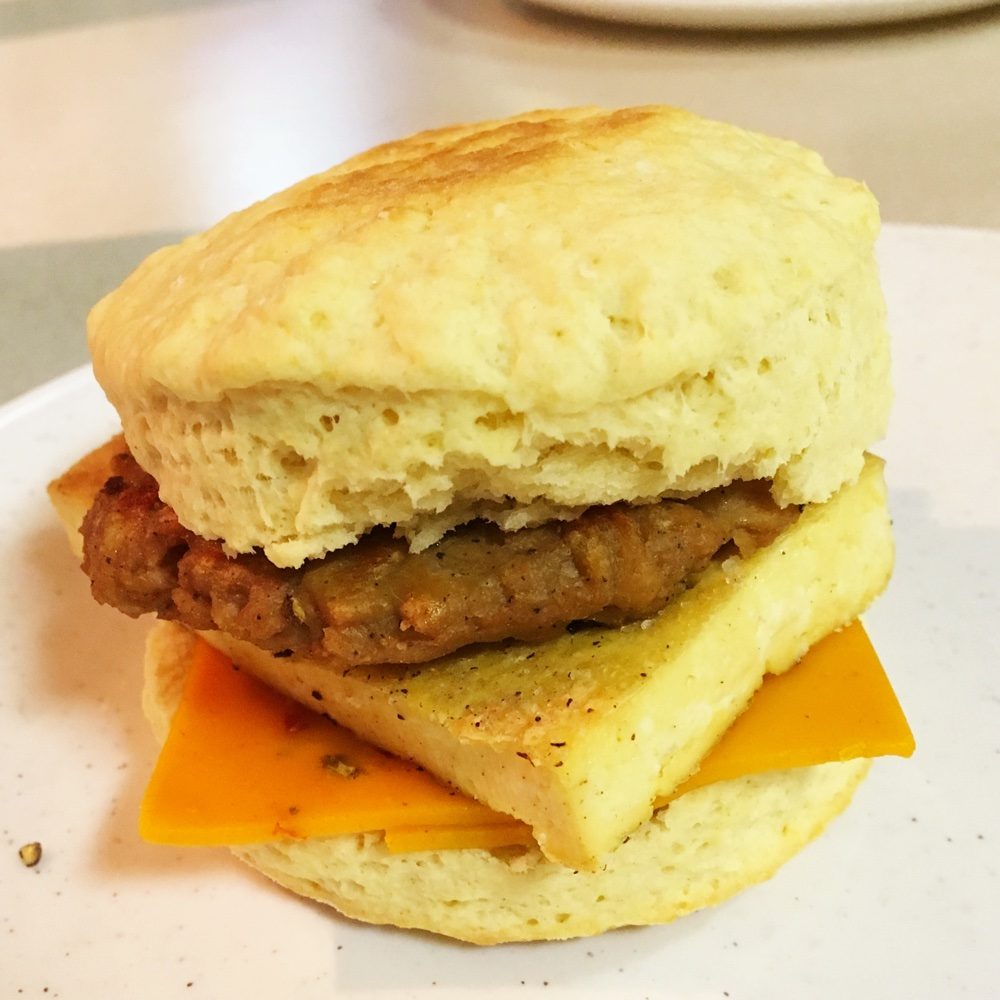
It may have been a bit of work up front, but it made breakfast for us for two mornings, and it could’ve been three if I’d cut the tofu differently.
Fluffy Vegan Breakfast Biscuits
Equipment
- pastry blender
- baking sheet
- parchment paper
- biscuit cutter
Ingredients
- 2 cups unbleached all-purpose flour
- 1 tablespoon baking powder
- 1 teaspoon salt
- 1 tablespoon sugar
- 1/3 cup shortening
- 1 cup unsweetened non-dairy milk
Instructions
- Preheat oven to 425F.
- In a large bowl, whisk together the dry ingredients.
- Cut shortening into dry ingredients with a pastry blender until mixture resembles coarse crumbs with some larger pea-sized chunks.
- Gradually, stir in soymilk until mixture pulls away from the bowl.
- Turn out onto a heavily floured surface and knead the dough until it starts coming together and gluten begins to develop, add more flour if necessary.
- Pat dough to an 1/2-3/4" thickness, and cut dough using a biscuit cutter.
- Place on parchment lined baking sheet and bake for 12-13 minutes or until a nice light, golden brown.
Notes
What’s your favorite splurge RV breakfast?
